In Q-Sensei Logs, every deployment has its own User Management. Super Admin and Admin can add and remove users as needed or change user access permissions at any time.
Step 1: Select User Management in your Deployment Navigation
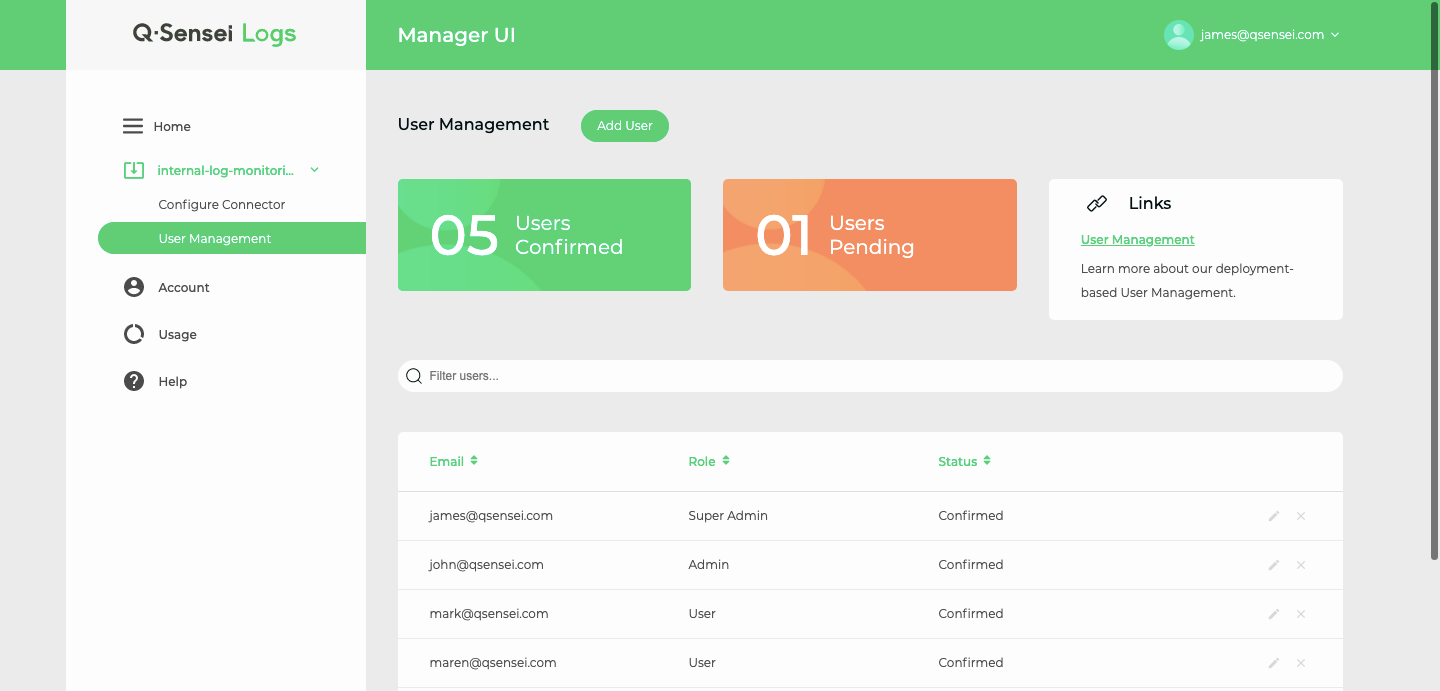
Select the User Management tab in the left navigation menu of your deployment.
When you first visit the User Management of a deployment, only the Super Admin who has purchased the contract is listed.
Step 2: Invite Users to your Deployment
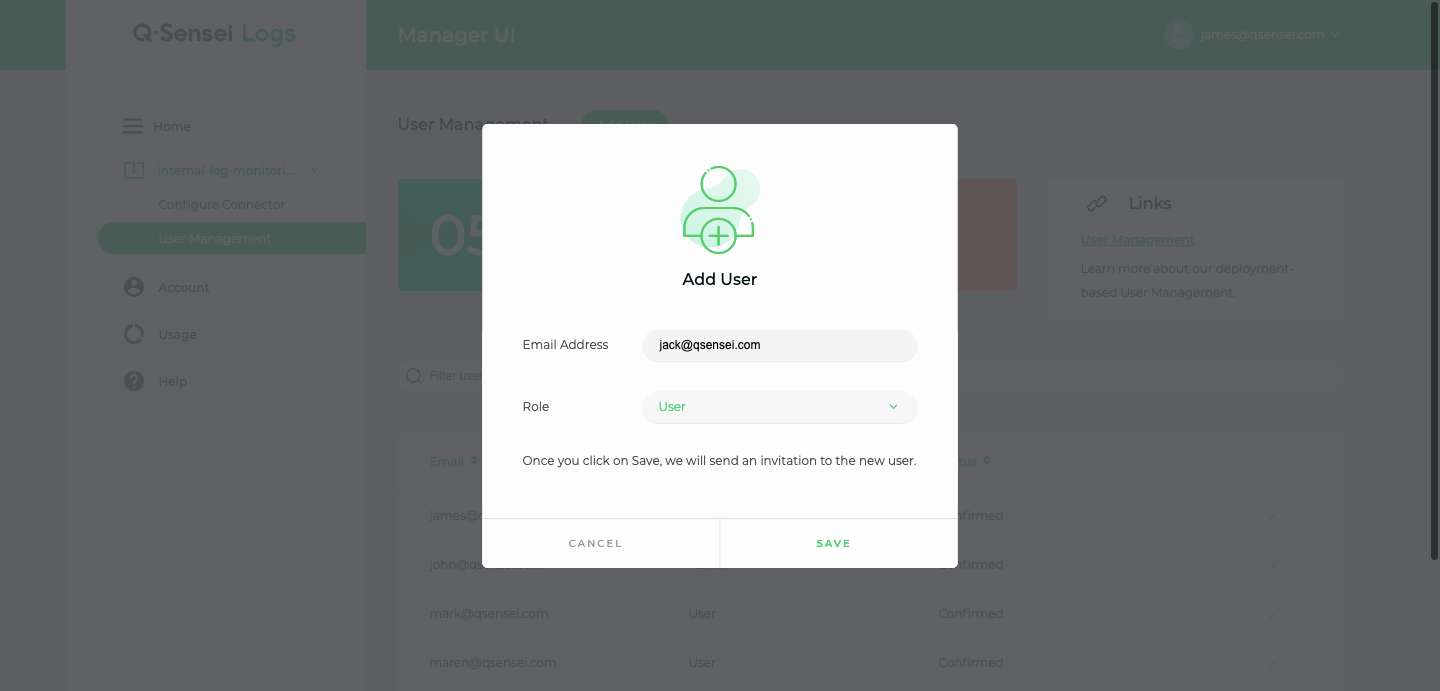
To add users, click on the Add User button on the User Management page. Add the email address of the user you want to invite and select the role. Click Save to send an invitation email to the new user.
Note
Users cannot sign up themselves, even if they visit the personal domain. Users can only be invited.
User Roles:
Super Admins and Admins get an overview of the user status per deployment.
Step 3: Edit User Details
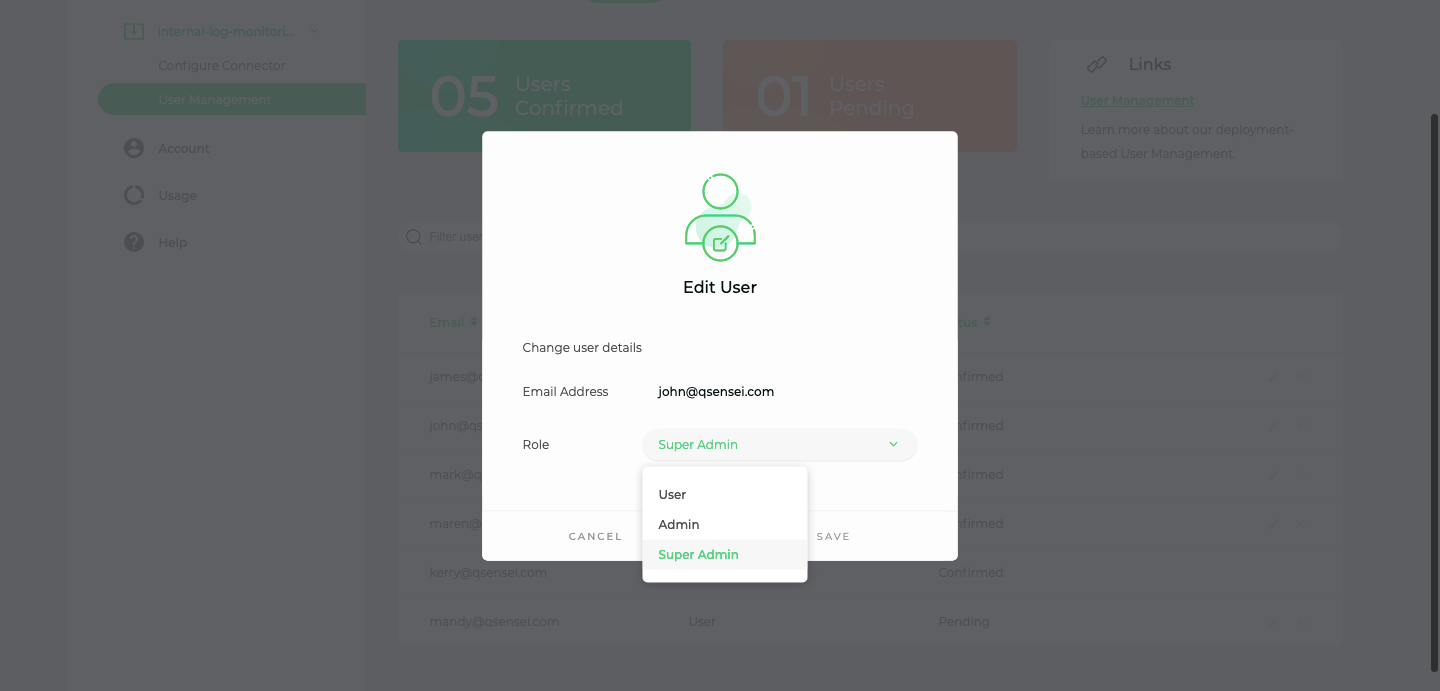
To edit the role of a user, click on the edit icon on the User Management page. Use the dropdown to select the new role and click Save.
Step 4: Delete Users
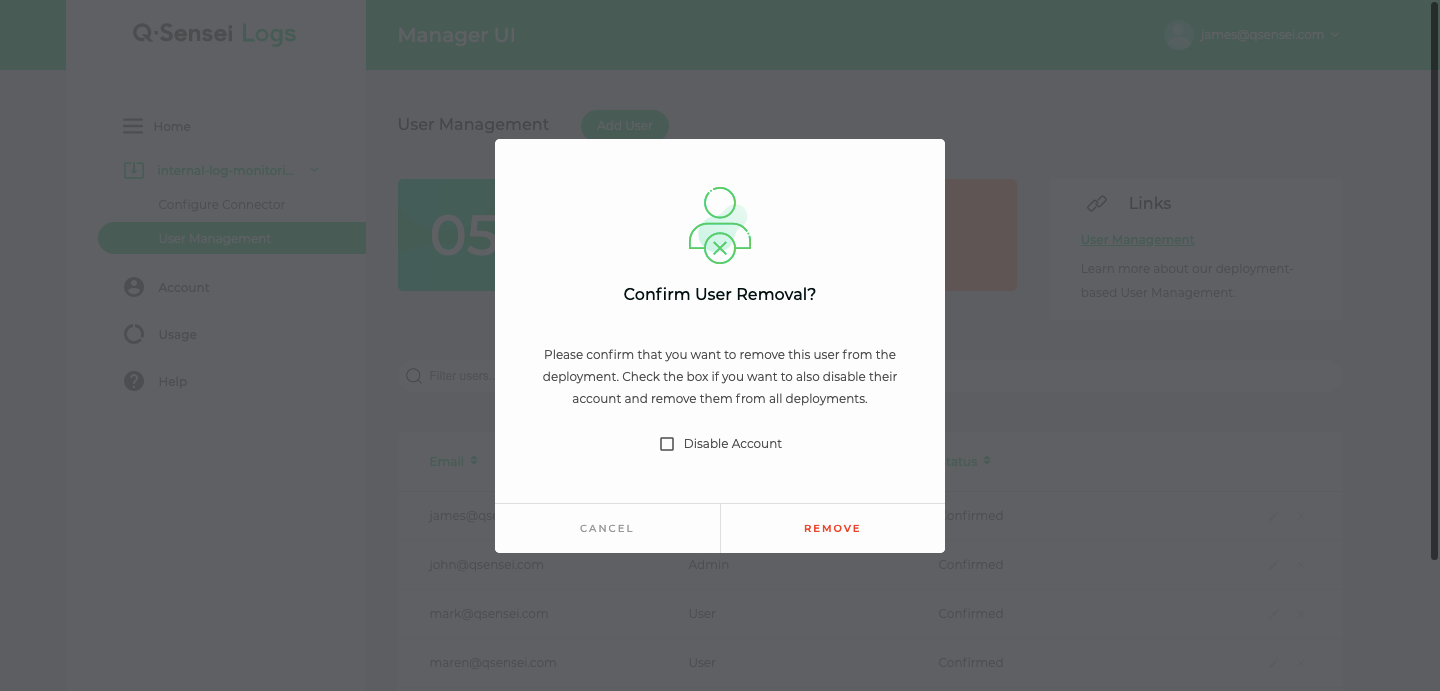
To delete a user from the deployment, click on the delete icon on the User Management page. Confirm that you really want to delete the user.
Deleting users form a deployment only affects this deployment. If users are allowed to see or manage other deployments in your Q-Sensei Logs application, they still have the permission to do so. To delete a user from all deployment select the checkbox in the delete popup.


